Well Water Inspection Checklist for Homeowners
Private well owners are solely responsible for their water quality. Unlike municipal water customers, there is no utility monitoring the safety of the water coming into their home. A once-a-year inspection catches problems before they become health hazards or expensive repairs. This checklist covers what to look for at the wellhead, in the surrounding area, and at the pressure system, plus when each item needs a licensed contractor instead of a weekend afternoon.
This page is part of our well water quality guide, the hub for all water quality and inspection topics.
Video guide
Video: “I tested the water from my backyard well” by Bad Homeowner
Who needs this checklist
This checklist is for: Homeowners with a private well (not connected to municipal water). It’s especially useful if you’ve owned the well for a year or more, you’re buying a property with a well, or you’ve had a recent flood or well repair.
This is NOT for:
- Homeowners on city water: see well water vs. city water to understand the difference
- Emergency pump failures: go directly to our well pump repair and troubleshooting guide
The CDC recommends a spring mechanical check annually in addition to annual water testing. We suggest combining both into one spring visit. It takes 1–2 hours and covers everything in this list.
Your annual well inspection checklist (overview)
Annual physical inspection combined with certified laboratory water testing is the minimum standard for safe private well maintenance, per both EPA and CDC guidelines. Run through this master list, then use the detailed sections below for each item:
- Check that the well casing extends at least 12 inches above ground
- Inspect casing for cracks, corrosion, or physical damage
- Check the well cap: secured, no cracks, vent screen intact
- Inspect the sanitary seal where electrical conduit enters the casing
- Verify the surrounding area slopes away from the wellhead
- Confirm a 50–100 foot buffer from pesticides, fertilizers, fuel, and pet waste
- Check proximity to septic system (minimum 50 feet in most states)
- Inspect the pressure tank: weight, cycling frequency, pressure gauge reading
- Check pressure switch electrical connections for corrosion or burning
- Collect a water sample and send to a certified lab (bacteria, nitrates, TDS, pH)
- Review previous test results and note any changes
- Document findings and schedule any needed repairs
Wellhead and casing inspection
Start at ground level with a visual inspection of the casing and everything visible above the surface.
What to look for:
- Casing height: The well casing should extend at least 12 inches above the ground surface. This is a common code requirement and prevents surface water from running directly into the well during rain or flooding. A casing flush with or below the soil line is a serious contamination risk.
- Cracks and corrosion: Walk around the casing and look for visible cracking, heavy rust, or sections where the casing has separated. Minor surface rust on steel casings is common; actual structural damage is a contractor call.
- Gap at the soil line: Where the casing meets the ground, check for gaps large enough for insects or rodents to enter. This zone is worth a close look because it’s often overlooked between inspections.
- Staining: Brown or rust-colored staining on the outside of the casing can indicate internal corrosion. Heavy staining that’s new since your last inspection warrants further investigation.
If you find structural damage to the casing, stop the inspection and call a licensed well contractor. A compromised casing is not a DIY repair.
Inspect the well cap and sanitary seal
A well cap inspection is the most important annual physical check. A cracked or unsecured cap allows surface water, insects, and rodents to enter the casing and contaminate the water supply. This is the most common contamination entry point documented in well inspection reports.
Well cap checklist:
- Is the cap locked or secured? Caps should not lift off without a tool or key. An unsecured cap is an open invitation.
- Any cracks or breaks? Even small cracks allow water to enter during rain. Replacement cost is typically $50–$150 installed, cheap insurance against a contaminated well.
- Vent screen condition: Most caps have a small vent screen that allows pressure equalization. Check that it’s intact and not rusted through or missing. A missing screen is an opening for insects.
- Sanitary seal: Where the electrical conduit (pump wiring) enters the casing, there should be a rubber gasket called a sanitary well seal. It should be fully intact with no gaps around the wires. Gaps here are direct contamination pathways.
If the cap is cracked, unsecured, or the sanitary seal has visible gaps, replace before the next rain event. This repair should be done before you collect your water sample.
Inspect the surrounding area
The ground management around your well has a direct effect on water quality. The EPA recommends that the area around a private well should slope away to direct surface runoff from the wellhead. Flat or inward-sloping ground is one of the most common causes of bacterial contamination after rain events.
Surface drainage check:
Pour a cup of water near the base of the casing. It should run away from the well in all directions. If it pools or flows toward the casing, you have a drainage problem. Adding gravel or re-grading the area redirects runoff, a straightforward DIY fix for most properties.
Buffer zone check:
Keep a 50–100 foot buffer clear of:
- Pesticides and fertilizers
- Oil, gasoline, or chemical storage
- Pet waste areas
- Compost piles
- Salt storage for driveways
Per EPA private well water protection guidelines{:target=“_blank”}, you should also never dispose of harsh chemicals, solvents, or petroleum products in a septic system. They leach through the soil and can reach groundwater.
Septic system proximity:
Note the distance between your well and the nearest septic system component (tank or drain field). The minimum recommended separation is 50 feet in most states, though codes vary. Check your state’s requirements. If you’re unsure where your septic system is located, your county health department typically has records.
New contamination sources since last inspection:
New driveways with oil-based sealant, new above-ground fuel tanks, or new garden beds with fertilizers all change the risk profile. Note anything that’s been added within 100 feet since your last visit.
Pressure tank and pump check
The physical inspection extends to the mechanical system inside. Most of this is visible from the pressure tank area.
Pressure tank checks:
- Weight and waterlogging: A healthy pressure tank holds an air charge above the water. A waterlogged tank (where the air charge is depleted) feels significantly heavier than it should and causes the pump to cycle on and off constantly with even small water draws. Lift or push against the tank; excessive weight is a warning sign.
- Pressure gauge reading: With water running in the house, watch the pressure gauge. Normal operating ranges are 30–50 PSI (cut-in 30, cut-out 50) for older systems, or 40–60 PSI for newer systems. A gauge that swings rapidly or never stabilizes points to a pressure tank or pressure switch inspection issue.
- Pump cycling frequency: A healthy system holds pressure and runs the pump only occasionally. If the pump clicks on every few seconds whenever water is running, that’s short-cycling, typically caused by a waterlogged tank or a failed bladder.
Electrical and connection checks:
- Inspect the pressure switch for corrosion or a burning smell at the contacts. Corroded contacts cause pump starting failures.
- Look for water stains around fittings and pipe connections. A ring of rust or mineral buildup around a fitting indicates a slow leak.
- Check that the electrical conduit from the switch to the pump is intact and properly secured.
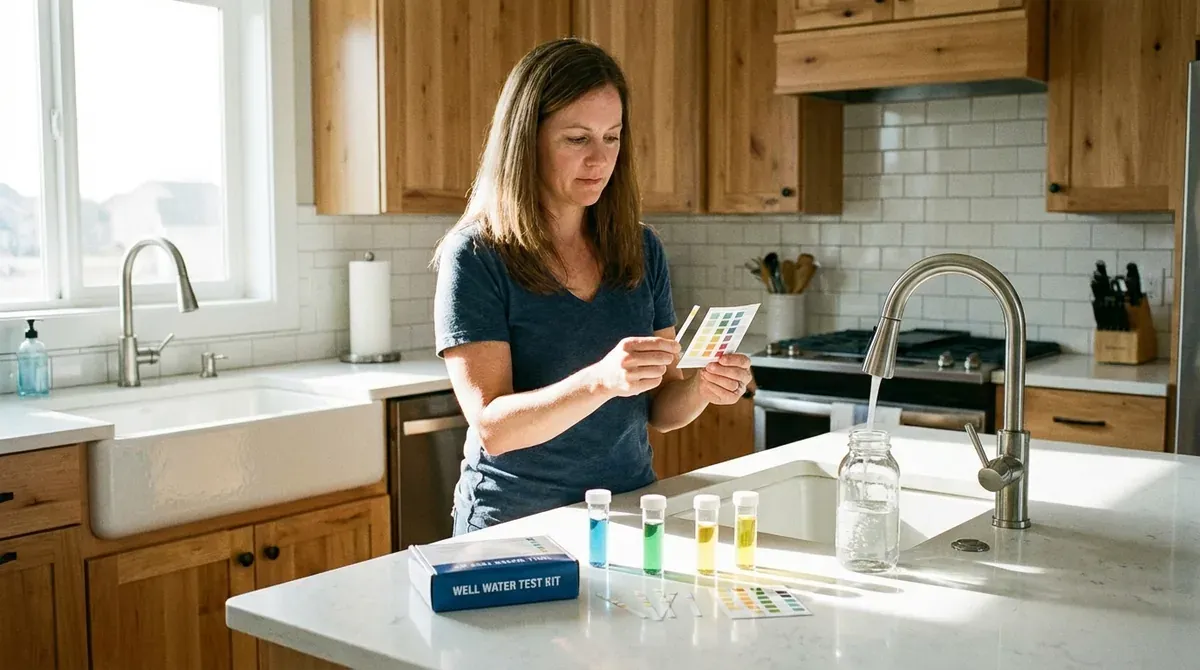
Annual water testing (required)
A physical inspection alone cannot detect chemical or bacterial contamination. Water testing is a required part of annual well maintenance. You can have a structurally perfect wellhead and still have nitrates above 10 mg/L or undetected arsenic in your groundwater.
What to test annually:
Per EPA and CDC testing guidelines{:target=“_blank”}, the four core annual tests are:
- Total coliform bacteria
- Nitrates
- Total dissolved solids (TDS)
- pH level
Certified lab testing costs $20–$300+ depending on panel size. Many county health departments offer free or low-cost testing for bacteria and nitrates. Call yours before paying full lab rates.
When to collect the sample:
Collect your water sample after completing the physical inspection. If you disturbed the wellhead during the cap check or cap replacement, wait 24 hours before sampling to let the water settle.
For a complete guide to sample collection, reading results, and what abnormal numbers mean, see our well water testing guide.
Every 3–5 years, extend your panel to include arsenic and heavy metals. Arsenic is naturally occurring in many groundwater sources and produces no taste or smell. Testing is the only way to detect it. See the DrillerDB well testing guide{:target=“_blank”} for a breakdown of extended panel options.
When to call a professional
Some findings from this checklist are DIY fixes. Others are contractor calls. Here’s the line:
Call a licensed well contractor if you find:
- Cracked, corroded, or structurally damaged casing
- A well cap that cannot be properly secured or sealed
- Physical damage to the wellhead from vehicles or equipment
- Exposed electrical connections or damaged conduit at the pump or switch
- Any evidence the casing has shifted or heaved
Call immediately if:
- Water test shows bacteria or nitrates above safe levels (bacteria: any detected; nitrates: above 10 mg/L)
- The pump is not delivering water or pressure is completely lost
- The pressure tank shows clear signs of waterlogging and short-cycling persists after bladder check
- You smell natural gas near the wellhead (call the gas company first)
Professional well inspection cost: A licensed well contractor inspection typically costs $100–$300 and provides a formal written report. This report is useful for home sales, insurance claims, and documenting compliance in states that require it.
After the inspection: recording your results
An inspection is only useful if you record it.
Keep a well log. A simple notebook or spreadsheet entry with the inspection date, what you observed, and what action you took (or deferred) is enough. Include:
- Date of inspection
- Each checklist item: pass / needs attention / repaired
- Water test results (include the actual numbers, not just “passed”)
- Any repairs made and by whom
File test results with your home documents. In many states, water test results are required documentation when selling a property. Keeping annual results on file saves time and negotiation headaches during a sale.
Schedule next spring’s inspection now. Put a calendar reminder for 10–11 months from today. The CDC recommends spring checks specifically. After winter, freeze-thaw cycles can damage the wellhead, and spring runoff increases contamination risk.
If any checklist items showed signs of bacteria in well water or other contamination, address those before closing the inspection loop. Contamination found during inspection and left unaddressed puts your household at ongoing risk.
After completing all items and getting clean test results: no further action until next year’s inspection.
For ongoing water quality management, see our well water contamination guide for what to do when results aren’t clean.
FAQ
How often should I inspect my private well?
Annual inspection is the minimum standard, per both EPA and CDC guidelines. We recommend a spring inspection timed with the CDC’s suggested “spring mechanical check.” After winter, wellhead components are more likely to have sustained frost damage, and spring runoff increases surface contamination risk. If you experience a flooding event, well repair, or a change in water quality at any point during the year, inspect and test immediately rather than waiting for the annual cycle.
What does a professional well inspection include?
A licensed well contractor inspection typically includes a flow test (measuring GPM output), a physical inspection of the wellhead, casing, cap, and pump equipment, an electrical system check, and a pressure system evaluation. The contractor will usually pull a water sample as well. The formal written report documents the well’s condition, identifies deficiencies, and provides a professional record for insurance or real estate purposes.
How much does a professional well inspection cost?
Professional well inspections typically cost $100–$300 for a standard inspection. The range depends on your region, whether the contractor pulls a water sample (adds $30–$150+ depending on the test panel), and whether any equipment needs to be accessed or tested beyond the visual check. Some states require a professional inspection when buying or selling a home with a well. In those cases, the inspection cost is usually a required line item in the transaction.
Can I do my own well inspection or do I need a professional?
Most of the annual checklist items in this guide are DIY-appropriate: checking the cap, inspecting the casing visually, evaluating drainage, and collecting a water sample. The mechanical checks (pressure tank, pressure switch, pump cycling) are also DIY-observable, though interpreting what you find may require a contractor. Professional inspections are required when you find structural damage, need a formal report for real estate or insurance, or when pump problems go beyond what the physical inspection reveals.
What should I look for when buying a home with a private well?
Request the most recent water test results and any well inspection records from the seller. If none are available, require a professional well inspection and a fresh water test as a condition of the purchase. This is standard practice and protects you from inheriting a contaminated or structurally compromised system. Key items to verify: when the well was drilled, the depth and casing material, the last pump replacement, and whether the seller has ever had a bacteria or nitrate failure. A DrillerDB or state well records database may have the original well log on file.